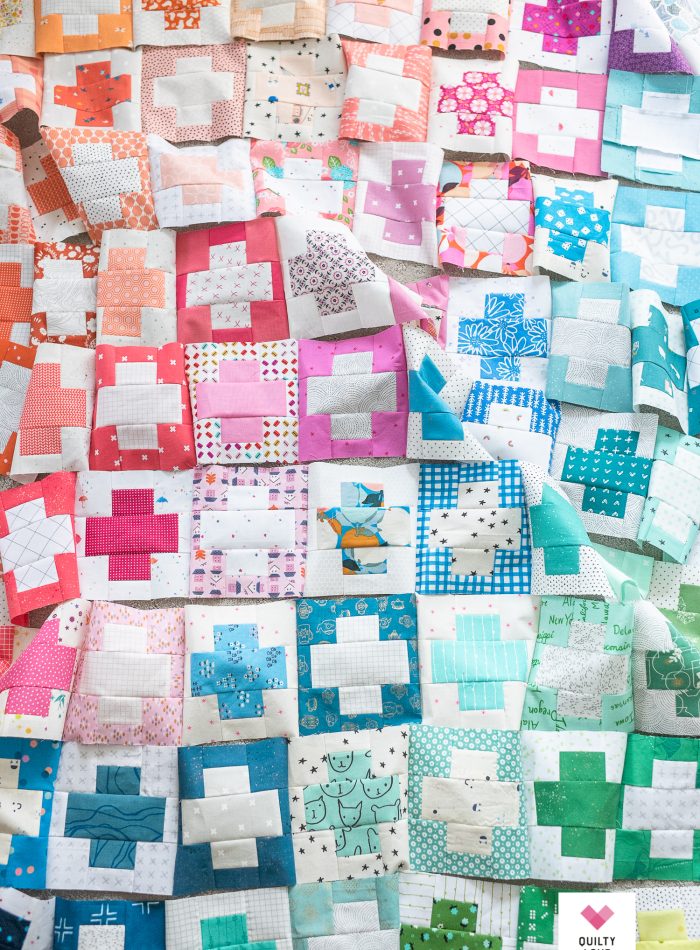
Welcome to week two of the Ombre Gems quilt along! Let’s start making some blocks this week!
It’s great to see so many already posting on the hashtag this week. Be sure to introduce yourself if you haven’t already! I love that those of you who started last year get a second chance at completing this quilt top this year 🙂 Glad to have you all back!
The Quilt Along
Materials needed:
Ombre Gems Quilt Pattern
Ombre fabrics– The quilt along will use all 20 colors! (or feel free to use any other fabrics)
Additional supplies that are helpful:
Stripology Ruler
Starch…lots of starch
How to Participate: The quilt along takes place on Instagram using the hashtag: #ombregemsquiltalong
Include the hashtag in your captions so we can all see your posts. Browse the hashtag to see what everyone else is up to!
Stay up to date: An e-mail will show up in your inbox on Monday morning with the weeks prompts. A blog post will also go up on Monday morning. There may be a few extra videos and tips and tricks in the e-mails so be sure to be signed up! (Sign up here)
Grab the pattern: If you don’t have the pattern already, grab your copy in the shop or below.
Gather the fabrics
You can use either yardage of each color or a fat quarter of each color. Jelly roll strips work also but you might consider trimming them to 2.5in wide for better accuracy.
Find your fabrics:
Regular Ombres– Handmade is Heartmade
Confetti Ombres – Fat quarter bundle – Simply Love Fabrics
Confetti Ombres – Half yard bundle – Cates Sew Modern
Week Two
- Large throw: Make six blocks for the week according to the schedule.
- Small throw: Make 2 blocks each week.
This week we are making Magenta, Hot pink and Popsicle Pink blocks.
This quilt is not the easiest one to make because of all of the seams. I did the math on this quilt no less than 47 times because I was so sure it was off when my seams just wouldn’t line up. The math was right. The seams leave very little room for error.
Lining up seams
My original Ombre Gems quilt is full of lost points and seams that don’t line up. My scrappy Ombre Gems quilt is just as full of these issues.
I am finally getting true to size, easy to line up blocks this time around. So all this to say, give yourself some grace! When making these blocks you might have to decide where you are more ok having your seams off.
Squaring up blocks
A lot of you guys are finding your blocks square up better at 11.75in over 11.5in. 11.75in might actually be a little more true to size so use that size if it’s working for you! Personally, that’s too large for my blocks and they tend to be closer to 11.5in. I do lose a point or two throughout the quilt but I’m ok with that.
I’ll include a video tutorial next week to help you trim up your blocks. You can trim all at once at the end or as you go. Waiting to trim up until the end isn’t such a bad idea because then you will have a better idea of exactly what size is working best for your blocks.

Cutting
You can go ahead and cut all of your ombres at once or cut as you go. I recommend making a block or two before cutting everything.
The exact cutting of the ombres is very flexible. In fact I recommend mixing up your cutting pattern so the blocks vary in gradients. Just so long as you end up with the right amount of pieces you can cut any way to get them.
I also cut all of the pieces from each color and then mix and match them to form the correct number of blocks. This allows me to place the gradients how I wish within the blocks.
Tips for Accuracy
Cut accurately and consistently. This is going to make all the difference for this block. If you are using a jelly roll strip, trim it to 2.5in wide first.
Use a scant 1/4in seam. This means just a touch under 1/4in. This allows you to keep the measurements spot on when pressing fabrics to the side. I also swear by my 1/4in sewing machine foot! I couldn’t live without this foot. It really helps with consistent seam allowances. Your machine might have come with this foot.

Use starch. Lots and lots of starch. The steam on my iron is broken so I use starch liberally. It helps the fabric behave and helps prevent stretching. I will sometimes starch fabric before I cut it but usually I’m starching when pressing the first seam on the fabric. And then I starch just about every seam after that. And then the block get’s one final starch before it’s trimmed. I use this basic starch and stock up at the big box store locally.
If your blocks are not lining up here are some things I suggest:
Test out your 1/4in seam. Measure to be sure you are getting an accurate 1/4in.
Check each cut piece of the block before sewing them together. Measure them individually to be sure they are the correct sizes.
Next week I’ll show you guys how I chain piece these blocks and how to trim them. They go together fairly quickly when you chain piece the entire week at once.

Official Ombre Gems Quilt Along post
Week One – Cutting and Prep
Week Two – Make Magenta, Hot Pink and Popsicle Pink
Week Three
Week Four
Week Five
Week Six
Week Seven
Week Eight
Week Nine
Week Ten


